
现代工具链uv的安装与使用
安装
独立程序方式安装
mac/linux
curl -LsSf https://astral.sh/uv/install.sh | shwindows
powershell -ExecutionPolicy ByPass -c "irm https://astral.sh/uv/install.ps1 | iex"独立程序版本,linux下安装在了 ~/.local/bin下有uv和uvx两个可执行程序
windows下安装在了 %USERPROFILE%/.local/bin下的uv.exe和uvx.exe两个文件
pip安装
更新
独立程序方式
uv self updatepip
pip install --upgrade uv使用场景举例
python版本管理器
查看可安装和已安装的python,这里图中的两个python,一个由安装包安装,一个由uv安装,uv均可检测到
shell
uv python list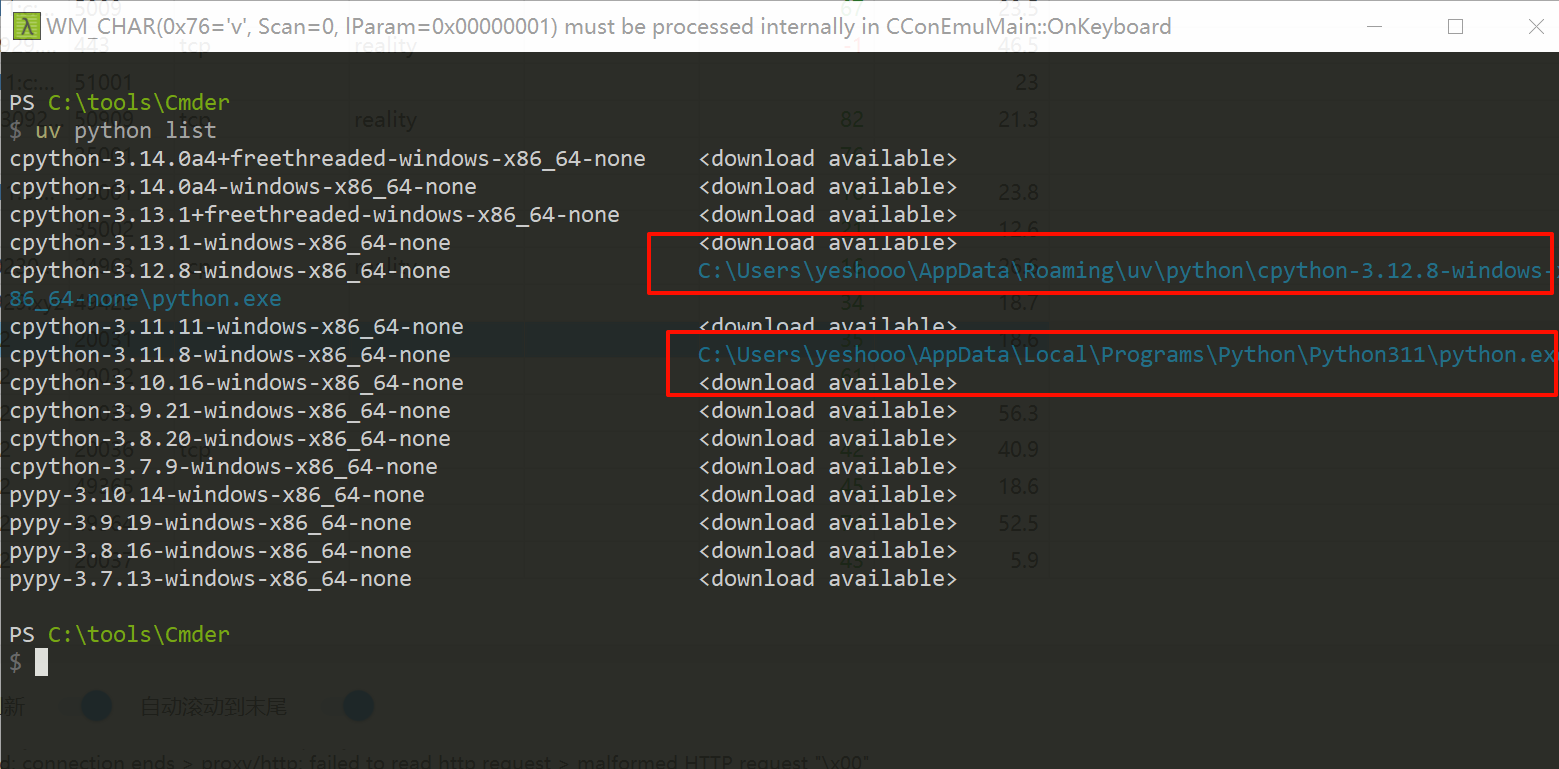
创建python项目
使用uv创建项目后,还会自动使用git管理项目
uv init 项目名 --python 版本
更多参数使用 uv init --help查询
如果不带参数名,会默认使用BUILD Systems自己推断
shell
uv init projectx
创建虚拟环境
uv venv xxx --python 版本
如:
shell
uv venv myenv --python 3.11初始化完项目之类立即执行,这时候会自动创建虚拟环境和uv.lock文件(uv.lock文件由uv自动管理,不要修改里面的内容)
如果没有创建虚拟环境,使用 uv sync命令会自动创建 .venv虚拟环境
shell
uv sync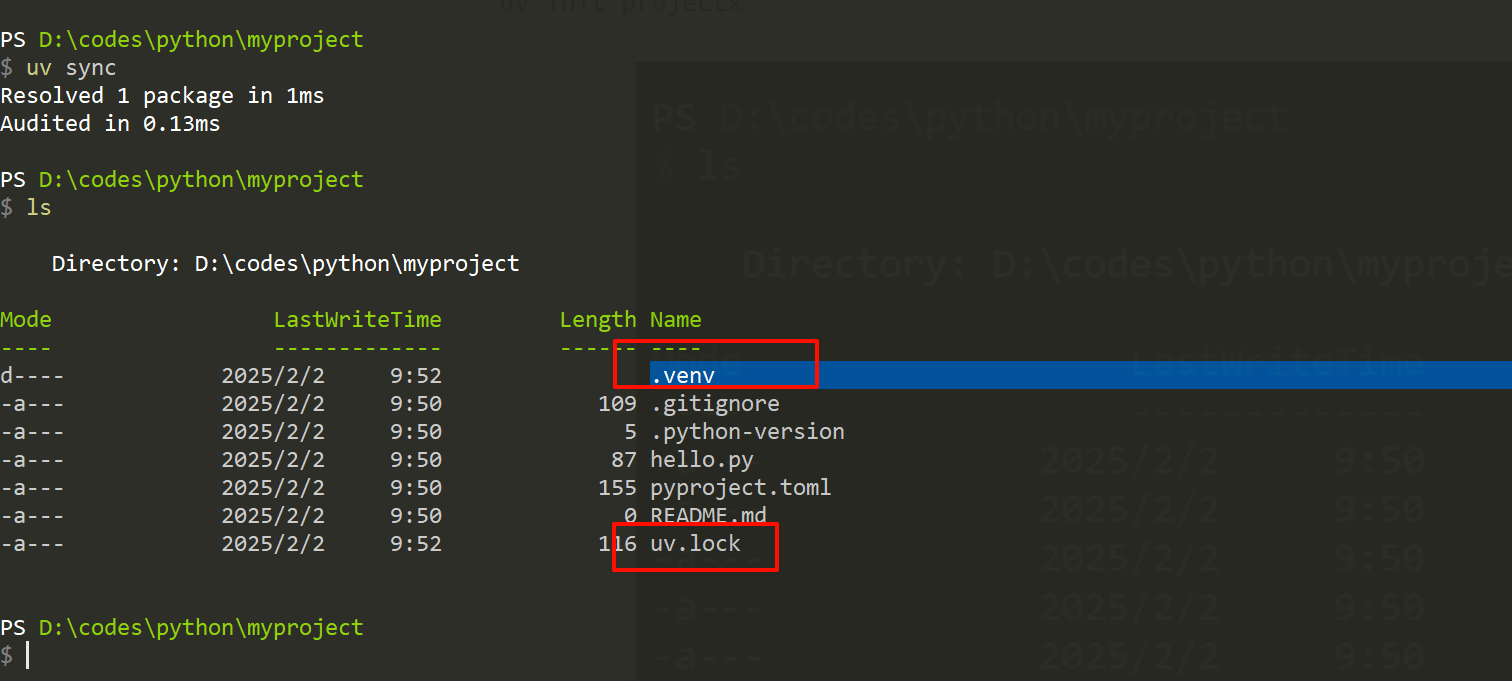
运行脚本
shell
uv run hello.pyrequirements.txt
这里很多种使用方式,具体根据需求参考官方文档
可以从pyproject.toml生成requirements.txt
shell
uv pip compile pyproject.toml -o requirements.txt从 requirements.txt中安装依赖
shell
uv pip install -r requirements.txt当然也可以从 pyproject.toml安装
shell
uv pip install -r pyproject.toml添加依赖
shell
uv add 包名也可以在原来的pip命令之前加上uv
shell
uv pip install 包名